How Can We Help?
Search for answers or browse our knowledge base.
-
POLICIES & PROCEDURES
-
TECHNOLOGY HOW-TO GUIDES
-
COMPUTING BEST PRACTICES
-
GENERAL TECHNICAL
-
NEWSLETTER ARCHIVES
< All Topics
Print
Android Email Setup
PostedOctober 27, 2023
UpdatedAugust 9, 2024
Byadmin
0
0
Table of Contents
The process outlined below may vary depending on your version of the Android OS installed on your device.
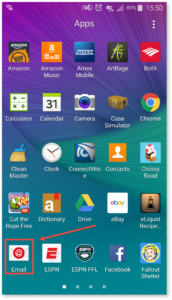
- Open Email App: On your Android Device, navigate to your apps directory and select “email”.
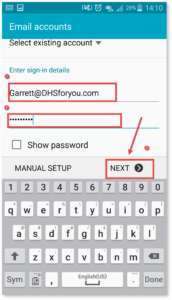
- Email Email Address & Password: Enter your email address, password, and click next.
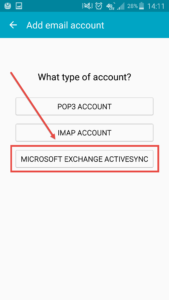
- Select Microsoft Exchange: Select “Microsoft Exchange” for account type.
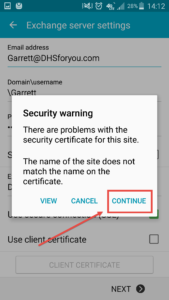
- Continue on Warning: If prompted by security warning, select continue.
- Enter Account Info:
- Enter your company Email address.
- For domain, enter “dhshosting.local“.
- Enter your email account password.
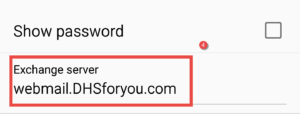
- For Exchange Server, enter “webmail.dtsit.com“.
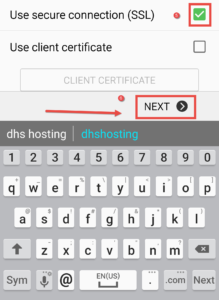
- Ensure that the User Secure Connection (SSL) tick box is checked.
- Select “Next” to complete.
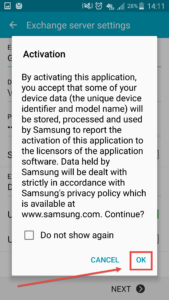
- Accept Activation Prompt: If prompted with an activation message, select ok.
- Set Account Options:
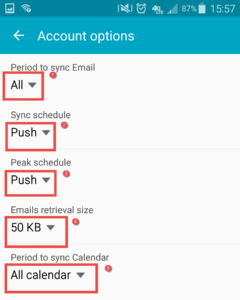
- Change the ‘Period to sync email’ setting in section 1 to “all”
- Change the ‘sync schedule’ setting in section 2 to “push”
- Change the ‘peak schedule’ setting in section 3 to “push”
- Change the ’emails retrieval size’ setting in section 4 to “50KB”
- Change the ‘period to sync calendar’ setting in section 5 to “All calendar”
- Make sure all tick boxes, marked 6 through 10, are checked.
- Ensure that tick boxes 11 and 12 are unchecked.
- Select next.
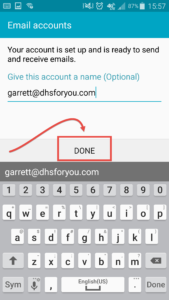
- Select Done: Select Done to complete your email setup for Android.
Was this article helpful?

